Introduction
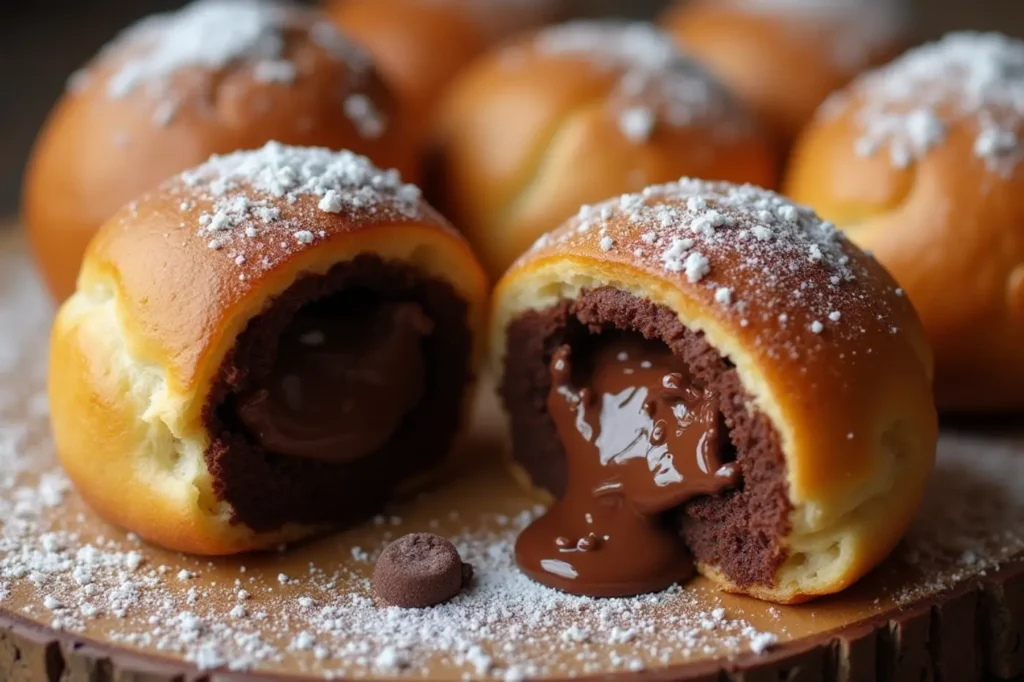
The smell of freshly baked buns floating throughout your kitchen. Baking for me is always a process of discovery and excitement. If it’s a peaceful weekend morning or an occasion it’s hard to beat taking a tray of golden brown chocolate-dipped buns from the oven. Through many years, I’ve played with numerous recipes, however the one I’ve chosen stands out because of its simplicity and taste.
If you’ve ever fantasized about creating your own perfect Chocolate Bun recipe then you’re at the right spot. In this tutorial, I’ll guide you through each step of the process, from creating the soft, fluffy dough, to creating that delicious chocolate icing. Let’s begin and unleash some baking magic in your kitchen!
Table Of Contents
Table of Contents
The Joy of Baking Chocolate Buns
There’s an unbeatable satisfaction in making things from scratch. Chocolate buns are a perfect way to combine the cozy soft bread texture with the delicious taste of chocolate melted. They’re also versatile and can be used for breakfast, as an afternoon snack, or as dessert. When you bake them in your home, you can alter everything from the intensity of the sweetness to the type of chocolate you use.
Why Homemade Buns Are Better
Although chocolate buns that are bought in stores can be convenient, they cannot be compared to the freshness and taste of homemade buns. If you make your chocolate buns you’re in control over your ingredients. You can select high-quality chocolate, modify the sweetness, and eliminate any preservatives or additives that aren’t needed.
If you love baking it is possible that you would enjoy looking at other homemade bread recipes. For example, these bread machine’s banana bread recipes are great for baking without fuss.
ingredients to prepare Chocolate Buns
The base of every great recipe lies in the ingredients. In the case of chocolate buns, each ingredient plays an important part in creating the perfect combination of flavor, texture, and scent. Let’s take a look at the ingredients you’ll need and the reason each ingredient is important.
Essential Ingredients for Soft and Fluffy Buns
To create brownies with chocolate that’s super soft and fluffy you’ll require:
- All-purpose Flour The base for the recipes. Its moderate gluten content provides the perfect balance between softness and structure.
- Milk adds moisture and richness to the dough and gives the buns a soft texture. Use whole milk to get the most optimal outcomes.
- Active Dry yeast Vital for dough’s rise to be airy. Be sure to keep it fresh to get the best outcomes.
- Sugar provides a hint of sweetness. It also feeds yeast, which helps the dough rise wonderfully.
- Salt is a sweetener that balances the sweetness and amplifies the overall flavor.
- Butter adds flavor and makes the buns more soft. Opt for butter that isn’t salted to limit the amount of salt.
- Egg helps to bind the dough and add softness to its texture.
Choosing the Right Chocolate: Tips and Options
The chocolate-infused filling is the center of this recipe, therefore choosing the correct kind is crucial. Here are some helpful tips:
- Dark Chocolate: It has a deep, slightly bitter taste that balances the sweetness of the dough. You should look for 60-70 percent cocoa content.
- Milk Chocolate: The perfect choice for those who prefer a more sweet filling.
- Chocolate Chips The chips are easy to use And melt beautifully.
- Chocolate Spread: A delicious and easy option. Famous brands such as Nutella will make the buns more delicious.
For a unique twist, try combining chocolates. Mixing dark and milk chocolates creates an intense, rich taste. If you’re looking for something different you could even mix in chopped nuts or dried fruits to give it a more textured flavor and texture.
Need more inspiration for your creative ideas? Take a look at the recipe we have for Cherry Chip Cake Another dessert that goes wonderfully with chocolate.
Once you’ve collected your ingredients, it’s now time to move to the most important part of the recipe: making the dough. Learn how to create a dough that is soft, airy, and ideal for chocolate cupcakes!
Preparing the Dough
It is the base of fluffy, soft, tasty chocolate cupcakes. Making it carefully will help you achieve baking with success. Do not rush this step, it’s where the magic starts!
How to Make the Perfect Dough for Chocolate Buns
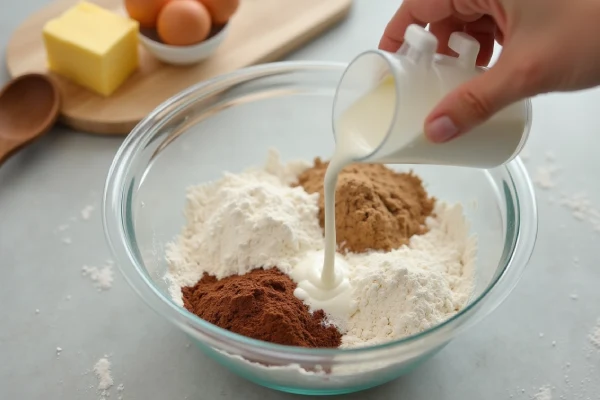
- activate the yeast: Start by heating your milk until it reaches 100 degrees (lukewarm but not boiling). Add one teaspoon of sugar, then sprinkle some active dry yeast over. It should sit for 5-10 minutes until it begins to foam. This is to ensure that your yeast is active and ready for action.
- Mix the Dry Ingredients:
In an enormous mixing bowl, mix all-purpose flour, salt, sugar and. Mix well with all the ingredients. - Combine Wet and Dry Ingredients:
Mix the yeast mix with the butter and a whisked egg into the flour mixture. Mix until a sticky dough is formed. - Knead the Dough:
Transfer the dough onto a floured surface, and then mix for 8 to 10 minutes until it is soft and elastic. You could also make use of a stand mixer that has dough hook attachments to perform this step. Properly kneading can help create gluten, which gives the buns that distinctive smooth and soft taste.
Resting and Proofing: Key to Softness
- First Rise:
After kneading, form it into a small ball, and put it in a bowl that has been greased. Cover with a damp towel or plastic wrap, and allow it to rest in a warm location for a minimum of 1-2 hours or until it expands to the size of a golf ball. - Why Proofing Matters:
Proofing is the process that allows yeast to produce the gas which gives your buns their airy texture. If your dough isn’t rising make sure your yeast is in good condition or if the temperature is cold enough. - Punch Down the Dough:
After the first rise, gently press down the dough to release any air that has been trapped. This will ensure a uniform crumb structure for your buns.
Making the perfect dough might require some practice however, it’s well worth it. This method is also excellent in other recipes, such as this recipe, which is our San Francisco Sourdough Bread, and other recipes where dough-making abilities are crucial.
We’ll then get to the most exciting part, adding the delicious chocolate filling! Continue reading to transform your dough into delicious chocolate buns.
Adding the Chocolate Filling
When you’ve got your dough ready now is the time to turn it into chocolate-yolk buns. Fillings are where flavor shines, so be sure to evenly distribute it to ensure a balanced flavor in each bite.
Spreading the Chocolate Filling Evenly
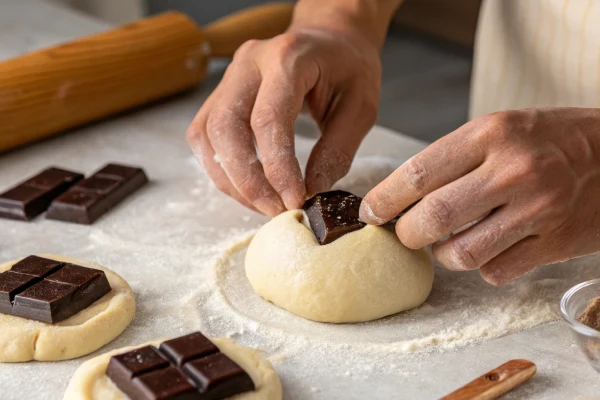
- Roll Out the Dough:
On a lightly sprayed surface then roll your dough to a rectangle shape that is about 1/4-inch thick. The shape doesn’t need to be perfect but try to have an even thickness for consistent baking. - Prepare the Chocolate:
Make sure you melt your chocolate, if you’re using chips or bars or get your chocolate spread prepared. When you’re making a spread, such as Nutella be sure that it’s cool enough to allow to allow for easy application. - Spread the Filling:
Use a spatula, or the spoon’s back to spread the chocolate evenly across the dough. Create a 1-inch border on the outside to stop the filling from spilling out when baking. - Optional Add-Ins:
To add a unique flavor you can add additional ingredients like chopped hazelnuts or walnuts and mini chips of chocolate. To give a caramel-like flavour it is possible to sprinkle a few drops of dulce de leche on top of your chocolate layers.
Optional Add-Ins: Nuts, Chips, or Caramel?
The addition of chocolate to your buns by adding ingredients creates delicious surprises in every bite:
- Nuts Add crunch using hazelnuts or pecans as well as almonds.
- White Chocolate Chips for a more sweet rich and creamy alternative to dark chocolate.
- Cinnamon and sugar Sprinkle the cinnamon and sugar over the chocolate to give it an added spice.
- Caramel Drizzle A gooey flavor that is a perfect match with melting chocolate.
The addition of these ingredients will not only enhance the taste but can also give your buns an individual look.
To get more ideas for experimenting with fillings and toppings, you might like these Protein Pumpkin Muffins they provide a variety of creative ingredient combinations.
After you’ve filled your buns Now it’s time to cut the chocolate cupcakes and then bake them. We’re ready to move on to your next task!
Shaping and Baking Chocolate Buns
After your dough is already filled and ready The next step is to shape and bake your chocolate buns with utmost perfection. This is where your imagination and attention to detail come into play, ensuring that every bun is as beautiful in taste and appearance.
How to Shape Your Chocolate Buns Perfectly
- Roll and Slice:
Starting with one of the edges that are longer begin to roll your dough to form a log similar to the way you make cinnamon rolls. After the dough is rolled, employ an abrasive knife or dough cutter to cut the log into equally sized pieces approximately 1.5 inches thick. - Prepare the Baking Tray:
Line the baking sheet with parchment or grease lightly to avoid sticking. Place the buns cut side to side, leaving a bit of space between each bun to allow them to expand further. - Final Proofing:
Place the baking tray on a moist towel or plastic wrap. Let the buns proof for another 30 to 45 minutes. The final rise will ensure that they’ll become soft and fluffy after baking. - Egg Wash:
The tops of the buns use the mixture of egg beat and milk. This will help bake them to a golden brown color.
Baking Tips for Golden Brown Perfection
- Preheat the Oven:
Set the oven temperature to 350 degrees (175degC) and let it heat up completely before baking. A uniform temperature is essential to ensure that your buns bake evenly. - Bake Time:
Place the baking tray in the oven for baking. Bake in the oven for about 20-25 mins or until the tops of the cakes are golden brown. Watch the tray during the final few minutes to prevent overbaking. - Cooling:
After removing the buns from the oven, allow the buns to cool a little on the tray before transferring them onto the wire rack. This stops the bottoms of the buns from getting soggy as they cool.
For more delicious, golden-baked goodies, make sure you check out the following guide for San Francisco Sourdough Bread.
When your chocolate buns are perfected now is the time to savor the delicious treats! Let’s look at how to serve your buns so that you can ensure the best enjoyment from your tasty creations.
Tips for Serving Chocolate Buns
Serving freshly baked chocolate muffins is the same as making them. The presentation and the pairing will make your buns go from being simple sweets to gourmet delights. Here’s how you can maximize your tasty creation.
Serving Tips Cold vs. Hot. Cold
- Warm and Gooey:
Serve the buns hot straight from the oven or warm them gently to get that delicious, gooey chocolate filling. Just a quick microwave blast of 10 to 15 seconds can do wonders. - Chilled for a Firmer Texture:
For those who prefer more firm filling, allow the buns to cool completely and then serve at temperatures that are at room temperature. This recipe is great for picnics or as a lunchbox treat. - Toppings to Enhance Flavor :
- powdered sugar A slight dusting of powdered sugar adds a touch of beauty and sweetness.
- Drizzled Ice Combine powdered sugar with milk to make an easy glaze that compliments the buns beautifully.
- Whip Ice Cream or Cream Add a dollop of whipping cream or a scoop of vanilla ice cream to make an indulgent dessert.
Pairing Suggestions: Drinks and Toppings
- Hot Beverages :
- Enjoy your buns alongside hot freshly made hot cocoa or coffee for the perfect combo.
- Herbal teas such as mint or chamomile can provide a refreshing contrast with the richness of chocolate.
- Cold Drinks :
- Serve it with a glass of cold milk to enjoy a nostalgic sweet treat that is a comforting and relaxing pleasure.
- Chocolate milkshakes or iced lattes are great accompaniments to an experience of a chilled bun.
If you’re interested in exploring different dessert options, make sure to take a look at the Cherry Chip Cake. It’s a delicious treat that is perfect with tea or coffee.
If you’re now aware of what to do with your buns elegantly Let’s look at suggestions for storing and heating the buns to ensure that they stay fresh in tact!
Variations of Chocolate Bun Recipes
Chocolate buns are a plethora of desserts, and playing around with various flavors and designs will make them even more delicious. From innovative variations on the traditional cake to recipes from all over the globe Here are some intriguing ways to experiment with.
Different Types of Chocolate Buns Around the World
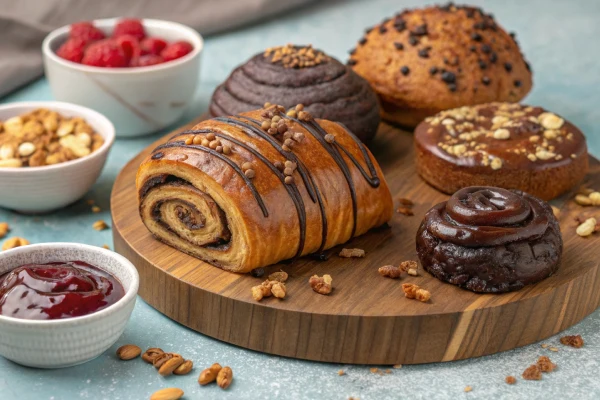
- Pain au Chocolat (France):
The classic French dessert, this version is made of flaky croissant dough and wrapped around chocolate-rich batons. The perfect choice for those who appreciate the soft, buttery texture that melts in your mouth. - Chocolate Babka (Eastern Europe):
Babka can be described as a delicious braided bread that has layers of chocolate filled with frosting that is sprinkled all over. It’s denser than traditional buns and ideal to slice and share. - Steamed Chocolate Buns (Asia):
The buns are made of soft, fluffy steaming dough that is often filled with cocoa and stuffed with chocolate melts and chocolate cream. - Chocolate Cinnamon Rolls (USA):
A mix of cinnamon rolls and chocolate buns This version has chocolaty ingredients in the dough as well as the glaze, making for a decadent dessert.
Creative Twists: White Chocolate, Dark Chocolate, and More
- White Chocolate and Raspberry:
Switch the dark chocolate filling with white chocolate. Add layers of raspberry jam to give it the perfect fruity and tangy taste. - Salted Caramel Chocolate Buns:
Add a touch of chocolate to your dessert with the addition of a drop of salted caramel to create an exquisite flavor combo. - Nutty Delights:
Mix crushed hazelnuts, pecans, or almonds along with chocolate for extra crunch and flavor. - Triple Chocolate Buns:
Combine dark chocolate, milk chocolate, and white to make an explosion of flavor that is layered.
They are a great way to experiment with different recipes to satisfy your tastes and imagination. To discover more innovative ways to use baked goods, take a look at our favorite seasonal recipe, Protein Pumpkin Muffins.
With lots of options for playing in chocolate cupcakes, we’ll take a look at the most often-asked questions and help make your recipe!
FAQs About Chocolate Buns
Can I Use a Bread Maker for Chocolate Buns?
A bread maker can ease the process! Make use of the machine to mix and then knead the dough. When the dough is finished remove it from the machine, form the buns, then fill with to the filling with chocolate. Make the second proofing process and bake in the oven to achieve the best results.
Can I Freeze Chocolate Buns?
Absolutely! To freeze, let the buns for them to completely cool. Put the buns in a ziplock or airtight bag, and put them in the freezer for two months. When ready to enjoy, thaw the buns at room temperature, then warm them in the oven at 350degF (175degC) for 5-10 minutes for a fresh-out-of-the-oven taste.
What Kind of Chocolate Works Best?
High-quality Dark or semisweet chocolates are the best choice as it offer a luxurious and delicious taste. Milk chocolate can be used as an alternative to sweeter chocolate, and white chocolate can be utilized to give a distinctive twist.
Why Is My Dough Not Rising?
Make sure your yeast isn’t expired. Make sure that the milk or water that is used for activating the yeast is not too hot because extreme temperatures could destroy the yeast.
Can I Make These Buns Vegan?
Yes! Substitute dairy-based milk with soy or almond milk, butter made from margarine made from plant sources eggs, and blends of flaxseed or chia seeds.
Conclusion
There’s nothing as satisfying as the joy of baking chocolate buns. Their soft fluffy texture and delicious chocolate center These buns are guaranteed to delight anyone who gets to taste the treat. If you’re an experienced baker or are just beginning this recipe, it’s made to guarantee success at each step of the process.
Why buy store-bought buns when you can make something fresh and delicious at home? Additionally, you can personalize the buns according to your preferences. Experiment with a variety of toppings, fillings, and glazes to create a unique experience.