Table Of Contents
Table of Contents
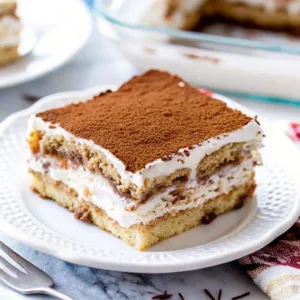
Black Velvet Cake is more than just a dessert—it’s an experience. Rich, moist, and packed with deep, velvety flavors, this cake has captured the hearts of bakers and dessert lovers alike. Whether you’re a seasoned baker or just dipping your toes into the world of cake making, this guide will help you master the art of creating a Black Velvet Cake that’s as beautiful as it is delicious.
Let’s dive into everything you need to know about Black Velvet Cake, including its history, key ingredients, baking tips, and how to serve it perfectly. Plus, we’ll share some bonus dessert recipes to inspire your next baking adventure!
What Makes Black Velvet Cake a Decadent Favorite?
The History Behind Black Velvet Cake
The Black Velvet Cake has a rich history that dates back to the early 20th century. Originally, it was known as “velvet cake” because of its incredibly smooth and velvety texture. Over time, variations of the recipe emerged, including the red velvet cake, which gained widespread popularity in the 1950s.
The Black Velvet Cake, however, remained a classic favorite, especially in southern regions of the United States. Its deep, rich flavor and striking appearance make it a standout dessert that’s become a staple in bakeries and home kitchens alike.
Key Differences Between Black Velvet and Red Velvet Cakes
While both black Velvet and Velvet Cakes share some similarities, there are a few key differences that set them apart:
- Color: The Black Velvet Cake gets its signature dark color from Dutch-process cocoa powder, while the Red Velvet Cake uses a combination of food coloring and cocoa powder to achieve its signature red hue.
- Flavor: The Black Velvet Cake has a deeper, more intense chocolate flavor, while the Red Velvet Cake is slightly sweeter and tangier because of the addition of cream cheese in its frosting.
- Texture: Both cakes are moist and velvety, but the Black Velvet Cake often has a slightly denser texture due to the higher cocoa content.
Why This Recipe Delivers Ultimate Richness
The Black Velvet Cake’s richness comes from a combination of high-quality cocoa powder, buttermilk, and a generous amount of butter and oil. These ingredients work together to create a moist, flavorful crumb that’s hard to resist. Plus, the addition of cream cheese frosting or a rich chocolate ganache takes this cake to the next level.
Essential Ingredients for Black Velvet Cake
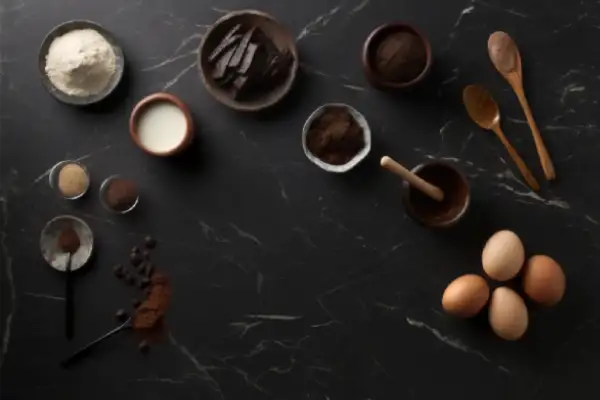
Must-Have Pantry Staples
To make the perfect black Velvet Cake, you’ll need a few must-have pantry staples:
- Dutch-Process Cocoa Powder: This is the secret ingredient that gives the cake its deep, rich color and complex chocolate flavor.
- Buttermilk: The acidity in the buttermilk helps balance the sweetness of the cake and creates a tender crumb.
- Oil: Vegetable oil adds moisture to the cake, ensuring it stays soft and velvety for days.
Pro tip: Be sure to use room-temperature ingredients for optimal mixing and even baking.
Psst! For more easy recipes, try our Garlic Parmesan Cheeseburger Bombs.
The Role of Black Food Coloring
The vibrant black color of the Black Velvet Cake is what makes it so striking. Achieving the perfect shade requires the right balance of cocoa powder and food coloring.
- Start by using high-quality Dutch-process cocoa powder for the base color.
- Add a small amount of black food coloring gradually until you reach the desired shade.
Pro tip: For the most vibrant results, sift the cocoa powder with the dry ingredients to ensure even distribution.
Frosting Pairings: Cream Cheese vs. Chocolate Ganache
When it comes to frosting, the Black Velvet Cake is versatile and pairs well with a variety of toppings. Here are two of our favorite options:
- Cream Cheese Frosting: Creamy, tangy, and slightly sweet, this frosting complements the rich chocolate flavor of the cake perfectly.
- Chocolate Ganache Frosting: For an extra decadent treat, try a luscious chocolate ganache frosting. It’s rich, and velvety, and pairs beautifully with the cake’s deep flavors.
Step-by-Step Guide to Baking Black Velvet Cake
Prep Work: Preheating, Pan Prep, and Mixing Tools
Before you start mixing, make sure your tools and pans are ready:
- Preheat your oven: Set your oven to the temperature specified in your recipe, usually around 350°F (175°C).
- Grease your pans: Use either butter or cooking spray to grease your cake pans to prevent sticking.
- Gather your mixing tools: You’ll need a large mixing bowl, an electric mixer, and measuring cups for precise ingredient measurement.
Pro tip: Use a scale for the most accurate measurements, especially if you’re a novice baker.
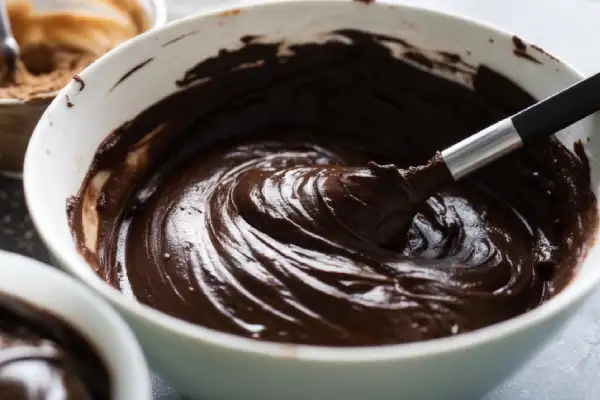
Mixing the Batter: Avoiding Overmixing for Perfect Texture
Mixing the batter is where the magic happens, but it’s easy to make a mistake.
- In a large bowl, combine the dry ingredients (flour, cocoa powder, sugar, salt, and baking soda).
- In a separate bowl, mix the wet ingredients (buttermilk, oil, eggs, vanilla extract).
- Gradually pour the wet ingredients into the dry ingredients and mix until just combined. Be careful not to overmix, as this can make the cake dense.
Pro tip: Use a rubber spatula to gently fold in any unmixed ingredients at the bottom of the bowl.
Baking and Cooling: Timing and Testing Doneness
- Bake the cake for 28-30 minutes, or until a toothpick inserted into the center comes out clean.
- Once baked, let the cake cool in the pans for 10 minutes before transferring it to a wire rack to cool completely.
Pro tip: Don’t skip the cooling step! Cooling the cake ensures it sets properly and prevents the frosting from melting.
Pro Tips for Flawless Black Velvet Cake
How to Prevent Dryness (Buttermilk Hacks)
One of the biggest challenges with Black Velvet Cake is keeping it moist. Here’s how to prevent dryness:
- Use room-temperature buttermilk. Cold buttermilk can cause the batter to seize, leading to a dry texture.
- Don’t overbake the cake. Check for doneness a few minutes before the recipe suggests to avoid drying it out.
Pro tip: For an extra-moist cake, try adding an extra tablespoon of oil to the batter.
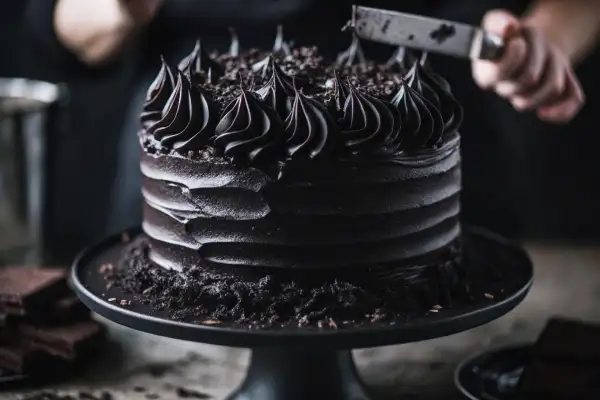
Layering and Frosting Like a Pastry Chef
Layering and frosting are where the cake goes from good to great.
- Slice the cooled cake into even layers using a serrated knife. If the layers aren’t perfectly flat, don’t worry! You can shave off the rounded edges for a cleaner look.
- Spread a thick layer of frosting between the layers and on the top and sides of the cake.
Pro tip: Use a cake turntable for easier frosting and decoration.
Decorating Ideas for Holidays and Special Occasions
The Black Velvet Cake is a blank canvas for creative decorating ideas. Here are a few inspirations:
- For Christmas: Top the cake with red and green sugar crystals and tiny candy canes.
- For Valentine’s Day: Pipe heart-shaped roses onto the frosting and add edible glitter for a festive touch.
- For Birthdays: Use colorful sprinkles or edible images of the celebrant’s name or photo.
Pro tip: If you’re short on time, consider using pre-made cookie crumbs or leftover cake crumbs for a quick and elegant decoration.
Serving and Storing Your Black Velvet Cake
Best Ways to Serve (Pairings with Coffee, Wine, etc.)
TheBlack Velvet Cake is perfect on its own, but it also pairs well with a variety of beverages:
- Coffee: The rich chocolate flavor of the cake complements a strong brewed coffee.
- Wine: A sweeter dessert wine, like port or sherry, can enhance the cake’s flavors.
- Ice Cream: Top a slice with vanilla or chocolate ice cream for a decadent treat.
Pro tip: Serve the cake slightly warmed for an extra moist and flavorful experience.
Bonus: Serve with Cheesecake Cookies for a dessert platter!
Storage Tips for Maximum Freshness (Fridge vs. Room Temp)
- Store the cake in an airtight container at room temperature for up to 3 days.
- Keep it in the fridge for up to 1 week for longer storage.
Pro tip: Let the cake come to room temperature before serving to restore its texture.
Freezing Instructions for Make-Ahead Desserts
- Slice the cake and wrap each slice tightly in plastic before freezing in an airtight container.
- The cake can be frozen for up to 2 months.
Pro tip: Thaw the cake at room temperature for a few hours before serving.
FAQs About Black Velvet Cake
Can I Substitute Natural Cocoa for Dutch Process?
While you can use natural cocoa, it won’t yield the same deep color and rich flavor. Dutch-process cocoa is the best choice for achieving the signature Black Velvet Cake look and taste.
How to Fix Cracked Cake Layers
If your cake has developed cracks, don’t worry! Simply spread a thin layer of frosting over the top before adding the next layer. The cracks will be invisible once the frosting is applied.
Is Black Velvet Cake Safe for Kids?
Yes! As long as it’s made with child-safe food coloring and no choking hazards, the Black Velvet Cake is perfectly safe for kids to enjoy.
Ready to Bake Your Own Black Velvet Cake?
Creating a delicious, showstopper Black Velvet Cake is easier than you think. Just gather your ingredients, follow the steps, and let your creativity shine in the decorating stage.
Share your creations with us on social media and don’t forget to tag us! We love seeing your baking masterpieces.
Happy baking, and until next time… sweet treats and delicious memories await!