Table Of Contents
Table of Contents
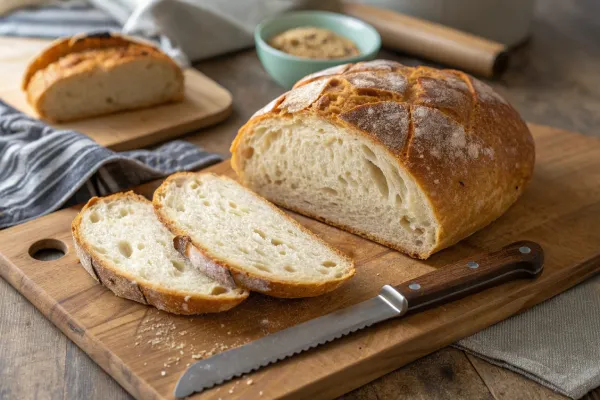
What Makes San Francisco Sourdough Unique?
History of San Francisco Sourdough
San Francisco sourdough boasts a tradition that dates back to the early California Gold Rush of the mid-1800s. During this time, miners discovered that leavened bread naturally made using wild yeast cultures gave a distinct and tangy taste. Early bakers made use of the ideal climate of the Bay Region for fermentation, and the San Francisco sourdough bread recipe swiftly became a popular local treat.
Role of Wild Yeast in the Tangy Flavor
What distinguishes San Francisco sourdough apart is the wild yeast and the bacteria that thrive within the Bay Area’s unique climate. A specific strain of bacteria, Lactobacillus sanfranciscensis thrives in the region’s cold and cloudy climate. This strain of bacteria coexists alongside wild yeast creating the bread’s characteristic tangy flavor with a chewy and spongy feel.
The interaction of these microorganisms is an excellent illustration of how science can create Sourdough. Each loaf tells a tale of flavor and fermentation that cannot be duplicated anywhere else.
Comparison to Other Sourdough Varieties
Sourdough bread is loved all over the globe, however, the San Francisco version of it is famous for its delicate sweetness and chewy crunch. Contrary to many breads made from commercial yeast, the sourdough is based completely on a naturally fermented starter which gives it a distinctive flavor each time.
Playing around with Quick Recipes
For bakers who are interested in exploring their baking, think about recipes for quick bread made from sourdough. These recipes offer a quicker way to taste sourdough’s sourdough-inspired flavors and avoid the long fermentation process.
Essential Ingredients and Tools
Key Ingredients for Authentic Sourdough
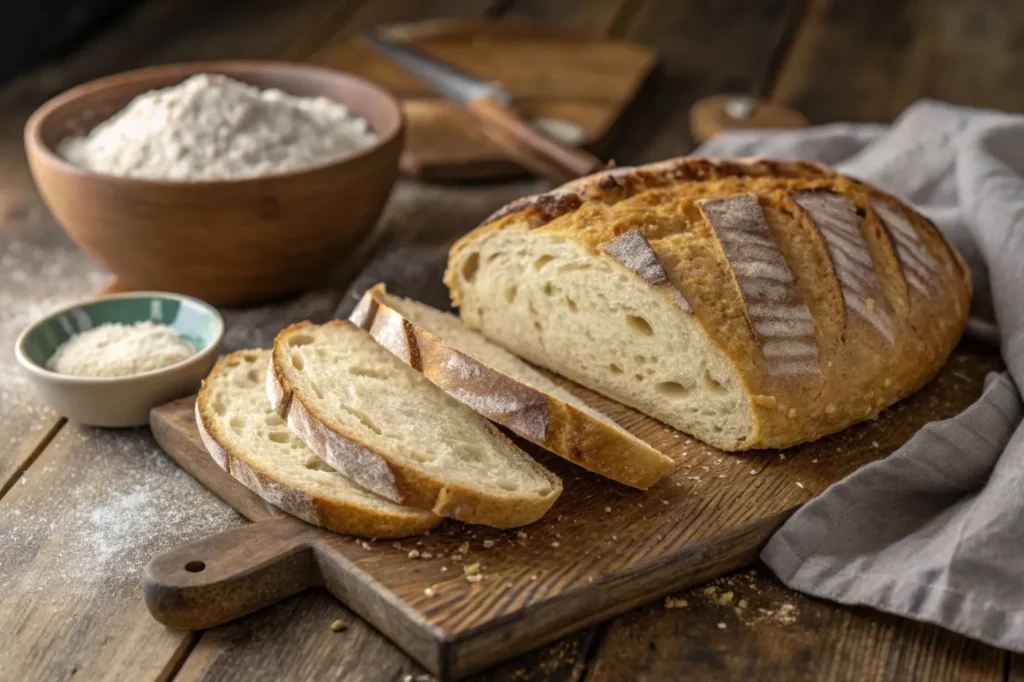
The heart of every delicious sourdough loaf is three essential ingredients which are flour, water, and salt. To make San Francisco sourdough, high-quality all-purpose flour, also known as bread flour, is essential since it gives the structure to create a soft crumb. Filtered water is suggested to prevent chlorine that can interfere with fermentation. Additionally, a fine sea salt will enhance the flavor but doesn’t overpower the tangy flavors of sourdough.
Making experiments with flour blends like whole wheat and rye will add depth to the flavor taste. It is important to start with white flour can be the most effective method to learn the recipe before attempting variations.
Must-Have Tools for Success
The making of San Francisco sourdough at home is easy using the right tools. The electronic kitchen scale guarantees precise measurements and consistency in results. The Banneton Basket assists in shaping the dough while it is proofing, creating a stunning spiral design on the dough. A Dutch oven is the best baking device, since it holds steam during baking, resulting in a crisp crust and soft interior.
Other necessities include a bread lame to score and a dough scraper for handling dough that is sticky, as well as thermometers to measure the temperature of baking and fermentation.
Optional Add-Ons for Experimentation
After you’ve mastered the basics then you can improve your sourdough’s flavor by adding tasty ingredients. Sesame seeds, sunflower, or poppy can add texture and impart a rich, nutty flavor. Herbs like rosemary or Thyme add a delicious addition, while a little cheese could create the most delicious, rich crust.
With a handful of key equipment and ingredients, you’ll be already on the way to making sourdough of bakery quality with ease at home.
Step-by-Step Guide to Making Sourdough Starter
What is a Sourdough Starter?
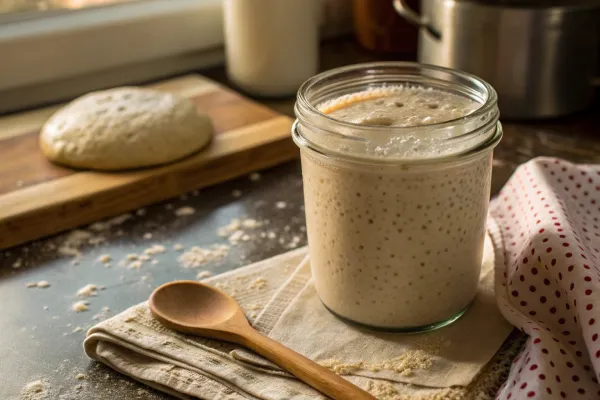
A sourdough yeast starter is a live culture of bacteria and wild yeast which acts as a natural leavening agent in your bread. In contrast to commercial yeast which has a quick rise, a starter made from sourdough is developed over time and creates the richness of flavor and distinctive tang and tang San Francisco sourdough.
The starter is at the center of sourdough baking and provides both structure and flavor. A proper diet and care are essential for maintaining its health and vitality to ensure an even and delicious outcome with every loaf.
how to Make Your Starter From Scratch
Making a starter from sourdough is simple, but it takes patience. Follow these steps to create an active, healthy starter:
- Day 1. In a clear jar mix 1 cup flour with 1/4 cup of water that has been filtered. Stir until no dry flour remains. Cover loosely and allow to rest at room temperature.
- Day 2 There will be bubbles appearing. Take half this starter. Feed it 1/2 cup of flour with 1/4 cup of water. Repeat the process every 12-24 hours.
- Day 4 Starter should grow in size within the first few hours after feeding, possess a tangy aroma, and be full of bubbles. At this point, it’s ready for use!
For storage that lasts for a long time, You can store the starter, feeding it every week.
Common Issues and Fixes for Starters
Even with the best intentions, there are always issues in your starter. Here are a few common problems and solutions for them:
- There are no bubbles or activities Make sure you’re using clean drinking water as well as fresh. The jar should be kept in a cool place (around 75degF).
- The smells are not pleasant A slight tangy scent is normal, however, an unpleasant smell could be a sign of contamination. Get rid of it and start over.
- Too thick or runny Adjust the flour-to-water ratio to get an almost pancake-batter consistency.
Once your starter is in place and you’ve got the basic ingredients required to bake countless variations of sourdough bread.
Mastering the Dough Preparation
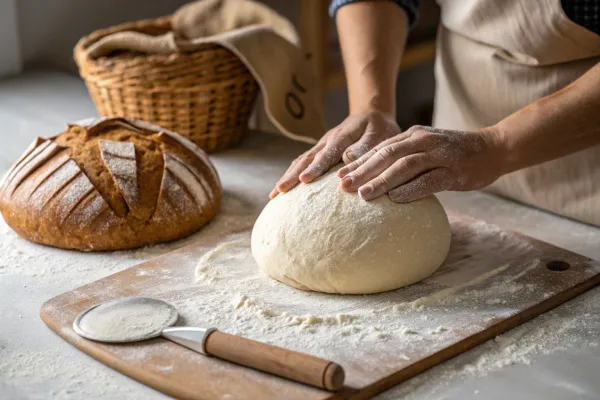
Mixing the Ingredients for the Dough
The best San Francisco sourdough begins with combining the correct ingredients in exact proportions. Begin by measuring the active starter flour along with salt, water, and flour. Make use of the electronic scale in the kitchen to ensure accuracy since even tiny differences can influence what you end up with as your loaf.
In an enormous mixing bowl, mix the starter with the water, flour, and starter. Stir until a shaggy, sticky dough develops, and then allow it to rest for 30 to 45 minutes. The resting time, also known as autolyze lets the flour fully get hydrated, making it easier to work with and improving its final appearance. After the autolyzing process is complete, add the salt and mix well until the salt is fully in.
Autolyse and Kneading Techniques
The autolyze procedure is a crucial process for forming the gluten in the dough and also for increasing its elasticity. After resting, you can begin mixing the dough with the stretch and fold method. stretch-and-fold technique that is less demanding than traditional kneading, and suitable for doughs that have high hydration.
This technique is to be used:
- Pick one edge of the dough then stretch it outwards and then fold it over the middle.
- Turn the bowl around and repeat the procedure on each side.
- Let the dough rest in the refrigerator for about 30 minutes between folding. Repeat the process three to four times over two hours.
This method is gentle and builds structure without working the dough too much, which results in the dough has a light crumb and a crunchy crust.
Managing Hydration Levels
The level of hydration plays a major impact on the bread sourdough. The dough used for San Francisco sourdough typically has a hydration range between 70 and 80 percent, meaning that the water weight is between 70 and 80 percent of the weight of flour. A higher hydration level results in a more open crumb, and a softer inside however it is a delicate handling.
If you’re not familiar with sourdough dough, start with lower levels of hydration until you get used to working with dough that is sticky. Gradually increase hydration levels as you build confidence.
The art of dough preparation is an essential step in the process of creating an ideal San Francisco sourdough loaf. If you follow these steps you’ll be on your way to creating baking-quality results at your home.
Cooling and Storing Your Bread
Proper Cooling Techniques
The process of cooling Your San Francisco sourdough bread is a crucial step that most do not think about. Freshly baked bread cooks inside for a few minutes after it’s taken out of the oven. Placing it on a rack of wire ensures that air circulates through the loaf and prevents the crust from getting soggy.
Let the bread sit for at minimum one hour before cutting. While it’s tempting, you should slice it right away however, this can result in a chewy texture when the crumb is set as it cools. It’s worth the wait to enjoy a chewy, delicious inside.
Best Ways to Store Your Sourdough
Sourdough bread is famous for its long shelf-life when compared with other breads, because of the acidity that comes that result from fermentation. To ensure it stays fresh:
- Keep the bread at ambient temperature in a paper container or wrapped with a fresh tea towel. This lets the crust remain firm while preventing the inside by preventing it from drying.
- Avoid plastic bags as they hold moisture and make the crust brittle and tasteless.
Sourdough is best eaten within 3-4 days to ensure optimal taste and texture.
Can You Freeze Sourdough?
Yes, sourdough can be frozen well, which makes it a great option to store it for a longer period. To freeze your loaf:
- Cool it to room temperature, and then cut it up into small pieces. This lets you remove only the pieces you require.
- Wrap the slices tightly with aluminum foil or plastic wrap and place them inside the freezer bag in a resealable container.
To enjoy, freeze slices at room temperature before serving or warm them in a toaster oven or oven for a crisp, fresh-from-the-oven taste.
Troubleshooting Common Sourdough Issues
Why Did My Bread Not Rise?
A frequently encountered problem with baking sourdough is the insufficient rise. The reason for this is usually an inactive starter. To correct this problem:
- Check that it is bubbly and that it doubles the size of your starter within 4 hours after feeding.
- Make sure you use warm water (but still not boiling) water for mixing your dough since the temperature can affect yeast activity.
- Increase the time for bulk fermentation If your kitchen is cool since the slower rate of rise is typical in colder areas.
If your dough isn’t able to rise, think about replenishing your starter by feeding it several times in two days to increase the strength of your starter.
How to Avoid an Overly Sour Taste
Although tanginess is an essential characteristic of San Francisco sourdough, too excessive sourness could overwhelm its flavor. This usually happens when the dough is fermented for too long or when the starter is excessively acidic.
To ensure that flavor balance:
- Reduce the time for proofing or make use of lower temperatures during the fermentation.
- Feed your starter regularly to keep a more gentle fresher and more youthful appearance.
- Sprinkle a little sugar or honey on the dough to counter the natural sourness.
Fixing Crust and Texture Problems
A hard crust or a hefty interior may be disappointing, however, these problems can be fixed by making a few changes:
- Hard Crust: If the crust is too difficult, be sure that your oven is steam-filled when baking. Utilizing the Dutch oven is helpful as does placing a pan of water into the oven to create steam.
- Dense Crumb: It is usually due to under-proofing or inadequate mixing. Make sure that the dough is hydrated well, and allow enough period of proofing and fermentation.
Handling Uneven Baking
Uneven baking, for example, an undercooked or burned crust, could be due to an insufficient oven temperature. Utilize an oven thermometer to ensure that your oven has been properly calibrated and is preheated to the correct temperature.
Troubleshooting is an integral part of the learning process for baking sourdough. Every challenge gives you the chance to improve your skills and help you attain consistently high-quality outcomes.
Creative Recipes Using Sourdough Bread
Sourdough French Toast
One of the most delicious ways to savor sourdough bread is to transform the bread to French toast. The tart flavor of sourdough is a perfect match with the custardy, sweet layer. Here’s how you can make it:
- Mix eggs, vanilla extract, milk, and a pinch of cinnamon.
- Dip thin pieces of bread sourdough in the mix, making sure that each slice is thoroughly coated.
- Cook in a skillet that has been greased at medium temperature until both sides are golden brown.
Serve it with fresh fruit, maple syrup, or powdered sugar to make an indulgent breakfast that is both delicious and filling. If you’re looking for more ideas take a look at this recipe for sourdough French toast recipe.
Sourdough Pizza Crust
Sourdough bread dough can be used as pizza crusts, providing an incredibly chewy texture as well as a slightly sweet tang. Here’s how:
- Then, roll out the Sourdough dough into a small rectangle or circle.
- Add pizza sauce or cheese and other toppings.
- Bake at 500degF for 10 to 15 minutes or until the crust has become golden and Cheese is bubbling.
This is an innovative method to make use of dough left over while eating a pizza made from scratch that is bursting with flavor.
FAQs About San Francisco Sourdough
How Long Does It Take to Make Sourdough Bread?
The process takes 24-48 hours, including time for feeding the starter, bulk fermentation, and proofing. Most of this is hands-off.
Can I Use Whole Wheat Flour for This Recipe?
Yes, but it absorbs more water, so adjust hydration. Whole wheat adds a nutty flavor and denser texture. For lighter bread, blend it with bread flour.
What’s the Best Way to Maintain My Starter?
Feed it equal parts flour and water daily at room temperature or weekly if stored in the fridge. Discard some starters before feeding.
Is San Francisco Sourdough Better Than Regular Bread?
It’s unique for its tangy flavor, chewy crust, and digestibility due to natural fermentation.
Can I Make Sourdough Without a Dutch Oven?
Yes, use a baking stone and a pan of water for steam. Alternatively, cover the dough with a metal bowl during baking.
What Should I Pair With Sourdough Bread?
Perfect for sandwiches, toast, or as a side for soups and stews. Try it for breakfast as French toast for a tangy twist.u can use it to make sandwiches or toast, or even as a condiment for stews and soups.
Conclusion
San Francisco sourdough bread is more than just a loaf. It’s a culinary style that’s recognized for its distinctive tangy taste and crunchy crust. If you follow the tips in this article, you’ll be in a position to create your very own homemade sourdough bread at your own home.
Begin baking today and discover the excitement of making this famous bread in the kitchen.